 Whatsable







Zapier Interfaces is a no-code visual builder that lets you create forms, web pages, and lightweight apps that connect directly to automated workflows. Now rebranded as Zapier Forms, it keeps all the same core functionality: a drag-and-drop editor, integration with Zapier’s library of 9,000+ apps, and the ability to turn a button click or form submission into a multi-step automated workflow. Think of it as the front end your Zaps never had. Instead of automations running invisibly in the background, Interfaces gives users an actual screen to interact with, whether that’s a client intake form, an internal approval dashboard, or a simple lead capture page.
Here’s what Zapier Interfaces delivers at a glance:
- A drag-and-drop builder requiring zero HTML or CSS knowledge
- Components including forms, Kanban boards, AI chatbots, link cards, and data tables
- Native connection to Zapier Tables for data storage and management
- Password protection, single sign-on (SSO), and custom domain support
- A free tier on every Zapier account, with advanced features available for $20 per month extra.
- Tasks automated through Interfaces generally don’t count toward your standard Zapier task limit
What core features does Zapier Interfaces include?
Zapier Interfaces is built around a set of modular components you assemble on a canvas. The component library covers forms, Kanban boards, AI chatbots, link cards, data tables, text blocks, media embeds, and dividers. Each one drops onto the page and connects to a Zap or a data source with a few clicks.
The integration story is what separates Interfaces from a generic form builder. Every component can pull from or push to Zapier Tables natively, and you can sync to external sources like Google Sheets or Airtable through standard Zaps. That means a table on your interface page can display live records, not a static snapshot.
- Forms: Collect input and fire a Zap the moment someone submits
- Kanban boards: Visualize and manage records stored in Zapier Tables
- AI chatbot: Build a conversational interface tied to your automation logic
- Link cards: Surface quick-action buttons that trigger specific Zaps
- Data tables: Display, filter, and update records directly from the interface
The drag-and-drop editor handles responsive layout automatically, so the same interface works on desktop and mobile without extra configuration. Branding options let you set colors, upload a logo, and point a custom domain at your interface on paid plans. One honest caveat: front-end design flexibility is limited compared to dedicated website builders. You can match your brand’s look, but pixel-perfect custom layouts are not the goal here.
Pro Tip: Focus your component choices on the integration points first. Ask which Zap each element needs to trigger, then build the UI around that logic rather than starting with aesthetics. Interfaces built this way tend to work better and require fewer revisions.
How to create your first Zapier Interface step by step
Building your first interface takes less time than you’d expect. The process follows a clear sequence: build the UI, connect it to automations, test it, then publish.
- Create a new Interface project. Log in to Zapier, navigate to the Interfaces tab, and choose either a blank canvas or one of the pre-built templates (lead capture, client intake, simple CRM, and others are available out of the box).
- Add and configure components. Drag forms, buttons, tables, or other blocks onto your canvas. For a form, configure each field type (text, dropdown, file upload) and set the submission behavior, either showing a confirmation message or redirecting to another page.
- Connect components to Zaps. Select a form or button, then map its submission action to a specific Zap. This is the step where your interface stops being a static page and becomes a workflow trigger.
- Build multi-page workflows. If your process has multiple steps, such as a multi-page onboarding flow, add additional pages and link them in sequence. Each page can reference different Zaps and Tables.
- Connect Zapier Tables for data storage. Link a Table to your interface so that every submission lands in a structured database you can query, filter, and export. This replaces the need for a separate spreadsheet or external database for most internal tools.
- Preview and test thoroughly. Use the built-in preview mode to submit test data and confirm that the connected Zaps fire correctly. Check field validation, conditional logic, and any redirect behavior before going live.
- Configure access permissions. Decide who can reach the interface: anyone with the link, anyone with a password, or only users you explicitly manage. On paid plans, SSO is also available.
- Publish and share. Hit “Publish” to generate a shareable URL. You can also embed the interface in an existing website using the provided embed code, or point a custom domain at it if you’re on a paid plan.
A few common pitfalls to avoid:
- Skipping the test step and discovering broken Zap connections only after sharing the link with users
- Building overly complex multi-page flows when a single focused form would do the job
- Forgetting to set access permissions, which leaves internal tools publicly accessible by default
- Overlooking DNS configuration when setting up a custom domain. You’ll need to create a CNAME record at your domain provider pointing to Zapier’s URL before the custom domain goes live.
Where Zapier Interfaces works best (and where it falls short)
Zapier Interfaces excels at focused, internal tools rather than broad, public-facing websites. The sweet spot is anywhere a team needs a clean UI to kick off a workflow, view data, or take action without digging into Zapier’s backend directly.
Strong use cases:
- Client intake forms: Collect project details, trigger a Zap to create a CRM record, send a confirmation email, and notify the assigned team member, all from one form submission
- Support request portals: Let employees or clients submit tickets that automatically route to the right queue
- Internal approval dashboards: Display pending requests in a Kanban view and let approvers click a button to trigger the next workflow step
- Lead capture pages: Capture contact details and fire them instantly into a CRM or email sequence
- Data entry interfaces: Replace messy email-based request workflows with a structured form that writes directly to a database
The cost angle is worth noting. Tasks automated through Interfaces generally don’t count toward your standard Zapier task limit, which makes data-heavy workflows significantly cheaper to run than equivalent setups using third-party form tools.
Where Interfaces falls short is equally clear. It’s not a replacement for full-featured web app platforms for public-facing products that require complex UI design, custom animations, or advanced user authentication flows. For those scenarios, dedicated no-code app builders are the right tool. Interfaces also only connects natively to other Zapier products; integrations with external apps require going through a Zap rather than a direct plugin. If your team is already deep in the Zapier ecosystem, that’s a non-issue. If you’re not, it’s a real constraint.

What does Zapier Interfaces cost?
Every Zapier account includes a free version of Interfaces with the core builder, basic components, and the ability to publish and share interfaces. The free tier covers most internal tool use cases without any additional spend.
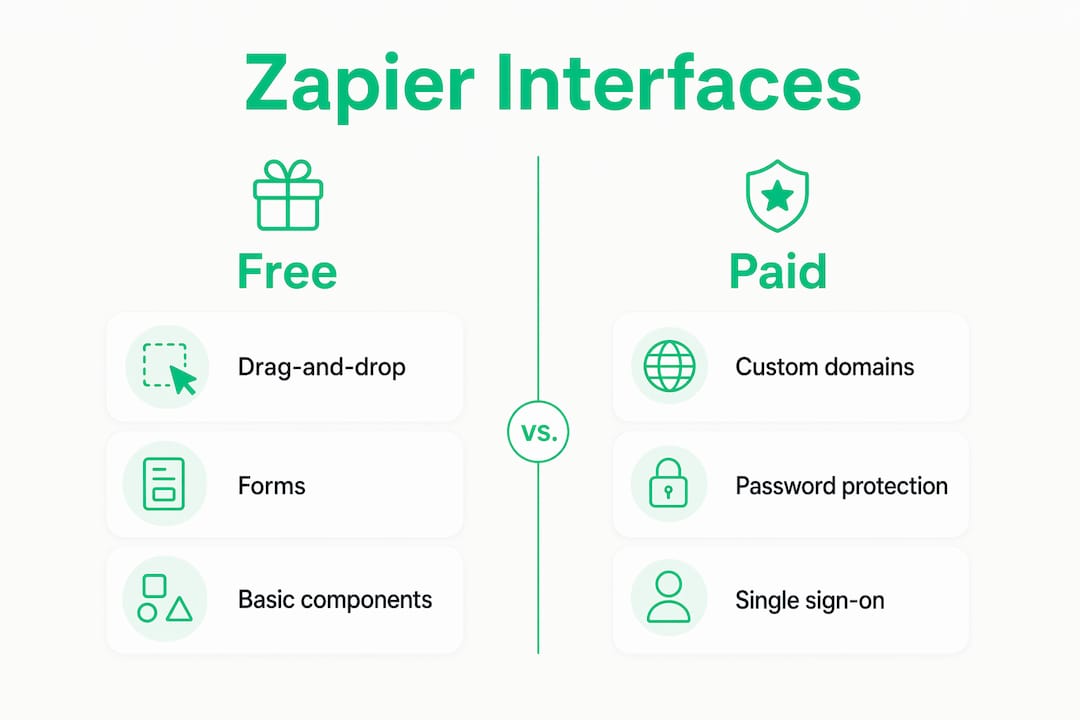
Advanced features require an add-on of $20 per month on top of your existing Zapier subscription. That unlocks custom domains, password protection, SSO, advanced branding controls, and expanded configuration options.
| Feature | Free | Paid ($20/mo add-on) |
|---|---|---|
| Drag-and-drop builder | Yes | Yes |
| Forms, tables, Kanban, chatbot | Yes | Yes |
| Zapier Tables integration | Yes | Yes |
| Shareable link | Yes | Yes |
| Password protection | No | Yes |
| Custom domain (CNAME setup) | No | Yes |
| Single sign-on (SSO) | No | Yes |
| Advanced branding and logo | No | Yes |
| Analytics tracking code | No | Yes |
One pricing detail that often gets overlooked: because tasks run through Interfaces don’t count against your Zapier task limit, the effective cost of running high-volume data collection workflows is lower than it looks on paper. A team running hundreds of form submissions per day through a third-party tool would consume Zapier tasks on every trigger; running the same workflow natively through Interfaces avoids that entirely.
Interfaces pricing scales alongside your standard Zapier plan. The $20/month add-on is flat regardless of which Zapier tier you’re on, so the value calculation is straightforward.
Best practices for designing effective Zapier Interfaces
The most common mistake teams make with Interfaces is treating it like a website builder. It isn’t. The goal is a focused, task-specific tool that makes a workflow easier to start or manage, not a general-purpose web presence.

Keep navigation minimal. If your interface has more than two or three pages, ask whether each one is genuinely necessary or whether you’re recreating complexity that belongs inside the Zap itself. For most internal tools, a single page with a clear form or action button outperforms a multi-tab portal that users have to learn.
Pro Tip: Design for the one or two actions users will take most often. Put those front and center. Everything else is secondary, and if it doesn’t directly connect to a Zap or a data action, it probably doesn’t belong on the interface at all.
Security deserves attention from the start, not as an afterthought. Interfaces supports password protection and SSO for securing sensitive workflows. Set access permissions before you share the link, and revisit them whenever the interface handles personal or financial data.
- Keep each interface focused on one process or workflow category
- Use templates as a starting point, then strip out anything that doesn’t serve the core task
- Test with real users before rolling out broadly. What feels obvious to the builder often confuses the first person who sees it fresh
- Avoid embedding tracking codes on internal tools unless there’s a specific analytics need. It adds complexity without clear benefit for most use cases
- Revisit the interface after a few weeks of real use. Actual submission patterns usually reveal one or two fields that nobody fills out correctly, which is a signal to simplify
For teams already using Zapier for messaging automation workflows, Interfaces is a natural extension: build the intake form, connect it to the Zap that fires your WhatsApp or email sequence, and you’ve replaced a manual handoff with a self-service trigger. That combination is where Interfaces delivers the most visible return.
Whatsable and Zapier: building smarter workflow interfaces

Whatsable integrates directly with Zapier, which means any form or portal you build in Zapier Interfaces can trigger WhatsApp automation sequences without writing a line of code. A client submits an intake form, a Zap fires, and Whatsable sends a branded WhatsApp message to the right contact automatically. The loop closes without anyone touching a keyboard.
For teams that want to go further, Whatsable’s white-label automation platform lets you brand the entire workflow experience, from the Interfaces front end to the WhatsApp messages your clients receive. That’s the kind of end-to-end setup that used to require a developer. Now it’s a configuration task.
Key Takeaways
Zapier Interfaces is the fastest way to build a user-facing front end for your Zapier automations, combining a free no-code builder with native workflow triggers and a $20/month add-on for advanced access controls.
| Point | Details |
|---|---|
| Free to start | Every Zapier account includes Interfaces at no extra cost; advanced features cost $20 per month. |
| Tasks don’t count | Automated tasks through Interfaces generally don’t count toward your Zapier task limit. |
| Best for internal tools | Interfaces works best for focused intake forms, dashboards, and portals, not public websites. |
| Security built in | Password protection and SSO are available on paid plans for sensitive workflow data. |
| Custom domains need DNS | Setting up a custom domain requires a CNAME record pointing to Zapier’s provided URL. |
FAQ
What is Zapier and how does it work?
Zapier is an automation platform that connects apps using a trigger-and-action model: when something happens in one app, Zapier takes action in others. It supports 9,000+ app integrations and requires no coding to set up.
What are Zapier Interfaces exactly?
Zapier Interfaces (now called Zapier Forms) is a no-code builder for creating forms, web pages, and lightweight apps that trigger Zapier automations directly. It adds an interactive front end to workflows that would otherwise run entirely in the background.
How do you create a form in Zapier Interfaces?
Log in to Zapier, open the Interfaces tab, start a new project, drag a form component onto the canvas, configure your fields, then connect the form’s submission action to a specific Zap. Publish the interface to get a shareable link.
What is a practical example of using Zapier Interfaces?
A common example is a client intake portal: a business builds a form in Interfaces, a client fills it out, and the submission automatically creates a CRM record, sends a confirmation email, and notifies the assigned team member, all through connected Zaps, as explained in automatización de propuestas comerciales para pymes.
Does using Zapier Interfaces cost extra?
The core builder is free on every Zapier account. Advanced features like custom domains, password protection, and SSO require an additional $20 per month on top of your existing Zapier plan.
 Elias Navarro